Choosing the right suspension lift isn’t about height; it’s about engineering a reliable system that matches your actual use case.
- Incorrect suspension geometry is the primary cause of dangerous handling characteristics like “death wobble” and accelerated tire wear.
- Superior on-road ride quality depends more on matching shock valving and spring rates to your vehicle’s weight than on the sheer height of the lift.
Recommendation: Before buying any kit, audit your truck’s current components and plan for the total impact on the entire suspension and drivetrain ecosystem.
You want to fit bigger tires on your truck. The goal seems simple, but it throws you into a world of confusing marketing terms: leveling kits, body lifts, suspension lifts, coilovers. Forum advice is contradictory, and every manufacturer claims their product is the ultimate solution. The common approach is to focus on a single metric—lift height—equating taller with better. This perspective often treats the modification as a simple, isolated upgrade for aesthetic appeal and tire clearance.
But what if the key isn’t just the lift, but the system it creates? A suspension modification is not a one-time purchase; it’s a commitment to managing a new set of dynamic forces acting on your vehicle. The real challenge is not just lifting the truck, but preserving its geometric integrity, optimizing its performance for your specific needs, and planning for its long-term reliability. A cheap kit might clear those 35-inch tires, but at what cost to handling, safety, and the lifespan of other components?
This guide moves beyond the marketing hype. We will deconstruct the process of choosing a suspension modification by treating your truck as an integrated system. We will explore how to protect your warranty, correct critical geometry, tune for actual on-road comfort, and understand the consequences for your vehicle’s frame and maintenance schedule. The goal is to empower you to make an informed engineering decision, not just an aesthetic one.
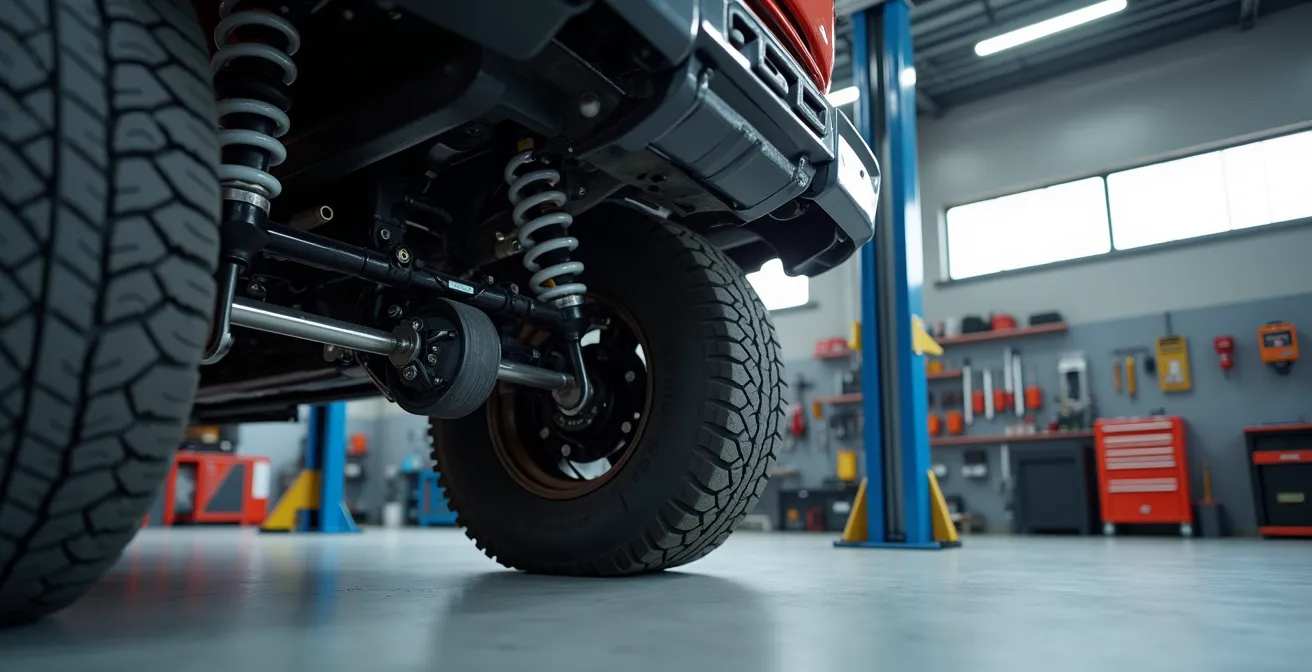
Modifying your truck’s suspension is a significant commitment. It’s about building a relationship of trust with your vehicle, ensuring it performs reliably and won’t let you down when you need it most. The following visual presentation, in its own unique way, underscores this timeless theme of reliability and commitment.
To navigate this complex topic effectively, this article is structured to walk you through each critical consideration. From the initial legal and warranty implications to the final choice of trails, the following sections provide a complete roadmap for a successful and reliable suspension modification.
Summary: A System-Based Approach to Truck Suspension Modification
- Understanding the impact on the manufacturer’s warranty
- Correcting geometry after a lift
- Optimizing on-road ride quality
- Comparing shock absorber types
- Planning maintenance for modified components
- Preventing frame damage
- The mistake of neglecting worn components
- Finding legal and safe trails for 4×4 use
Understanding the Impact on the Manufacturer’s Warranty
One of the first anxieties for any owner of a newer truck is the potential to void the manufacturer’s warranty. A common misconception is that any aftermarket part automatically nullifies coverage. In the United States, consumers are protected by the Magnuson-Moss Warranty Act, which states that a dealer must prove an aftermarket part caused the specific failure they are refusing to cover. For example, installing a lift kit cannot be used as a reason to deny a warranty claim on a faulty infotainment screen.
However, the gray area lies within the “component ecosystem.” A lift kit directly alters the suspension and drivetrain. If a wheel bearing, axle shaft, or ball joint fails prematurely, the dealer can argue that the increased angles and stress from the lift were the cause. This is where meticulous documentation becomes your most powerful tool. Before a single wrench touches your truck, you must establish a clear, undeniable baseline of its pre-modification condition. Having proof that a component was in perfect shape before the lift, and that the lift was installed professionally, can be crucial in a warranty dispute.
Furthermore, it’s vital to inform your insurance provider of any modifications. A lift kit and larger tires increase the value of your vehicle and can alter its risk profile. Failure to disclose these changes could lead to a denial of coverage in the event of an accident. Proactive communication and record-keeping transform you from a passive consumer into a prepared vehicle manager.
To prepare for any potential warranty discussions, a systematic documentation process is non-negotiable.
Pre-Modification Documentation Checklist
- Document your vehicle’s stock condition with photos and maintenance records
- Obtain written confirmation from your insurance provider about modification coverage
- Keep detailed records of all modification purchases and professional installation
- Inform your insurance provider about modifications to ensure coverage reflects upgrades
- Review the Magnuson-Moss Warranty Act protections for aftermarket modifications
Correcting Geometry After a Lift
Lifting a truck without correcting the suspension geometry is the single most common and dangerous mistake. When you raise the suspension, you alter critical angles—primarily caster, camber, and toe—that engineers spent thousands of hours perfecting. Ignoring these changes leads to poor handling, uneven and rapid tire wear, and potentially catastrophic component failure. Preserving geometric integrity is not an optional tweak; it is the foundation of a safe and reliable modified vehicle.
Caster angle is especially critical. It’s the angle of the steering pivot as viewed from the side of the vehicle, and it’s responsible for the steering’s self-centering effect and high-speed stability. Lifting a solid-axle truck with factory control arms reduces positive caster, sometimes even into negative territory. This is a primary cause of the infamous “death wobble”—a violent, uncontrollable oscillation of the front wheels that can only be stopped by bringing the vehicle to a near-complete halt.

As you can see, precise measurement is key. This is why high-quality lift kits are not just springs and brackets; they are complete systems that include components like adjustable control arms or track bars, drop pitman arms, and eccentric bushings. These parts are not optional upsells; they are essential tools for restoring the factory-designed geometry and ensuring your truck drives as well—or better—than it did stock.
Case Study: Death Wobble Resolution Through Caster Adjustment
An analysis of Dodge Ram 2500/3500 trucks experiencing death wobble after being lifted found a direct correlation with improper caster angle. Owners who installed high-quality lift kits that included adjustable control arms were able to restore the proper 3.5 to 5.5-degree caster angle. This simple but critical geometry correction completely eliminated the dangerous oscillation in vehicles that had previously experienced severe wobble at highway speeds, demonstrating that the problem is not the lift itself, but the failure to manage its geometric consequences.
Optimizing On-Road Ride Quality
Many truck owners who lift their vehicles for off-road aesthetics are unpleasantly surprised by the harsh, jarring ride on pavement, where they spend 99% of their time. The platitude “it’s a truck, it’s supposed to ride rough” is a poor excuse for an improperly engineered suspension system. Optimizing on-road comfort is a science of managing spring rates and shock damping, not just achieving a certain height.
A critical factor is the spring rate, which must be matched to the vehicle’s actual weight. This includes not just the base weight but also the “component ecosystem” of aftermarket bumpers, a winch, roof racks, and heavy gear. A linear-rate spring offers a consistent feel, but a progressive-rate spring is often superior for a modified vehicle. It provides a softer, more compliant rate for small bumps during normal driving and progressively stiffens as the suspension compresses, preventing bottoming-out under heavy loads or on large impacts.
As engineers from Penske Racing Shocks note, “Proper shock valving is more important than lift height for on-road comfort. A finely-tuned suspension keeps your tires in contact with the road in any situation.” Shock valving controls the speed at which the suspension compresses and rebounds. A quality shock, properly valved for your specific spring rate and vehicle weight, can transform a punishing ride into a controlled and comfortable one. This is why a cheap 3-inch lift with generic, stiff shocks will almost always ride worse than a premium 2-inch lift with purpose-built, correctly-valved shocks.
This table from a Penske Racing Shocks tuning guide illustrates how to approach spring selection as part of a total system.
| Vehicle Weight + Accessories | Recommended Spring Rate | Ride Characteristics |
|---|---|---|
| Stock weight | Linear springs | Comfortable daily driving |
| +200-400 lbs (winch, bumpers) | Progressive springs | Balanced comfort and load capacity |
| +400 lbs (full armor, gear) | Heavy-duty progressive | Firm but controlled |
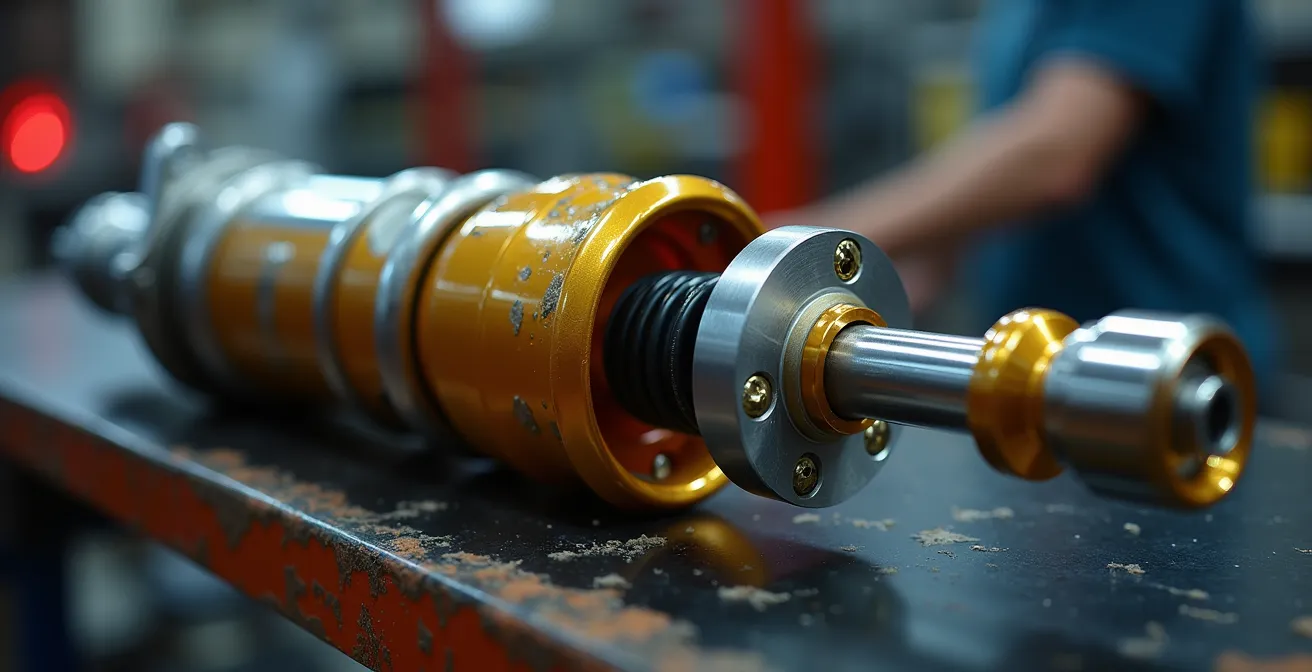
Comparing Shock Absorber Types
The shock absorber is the heart of your suspension’s performance and feel. It’s an oil-filled damper that converts the kinetic energy of suspension movement into thermal energy, controlling unwanted oscillation. While all shocks perform this basic function, their internal design dramatically affects their performance, longevity, and suitability for your specific use case. Choosing the right type is fundamental to your system’s success.
The most common types are twin-tube and monotube. Twin-tube shocks are the budget-friendly factory standard. They have an inner and outer tube, but this design makes them prone to aeration (oil and gas mixing) and heat fade under heavy use. They are adequate for street use but quickly become overwhelmed in demanding off-road conditions. Monotube shocks, with their single-tube design and high-pressure nitrogen charge separating the oil and gas, offer far superior heat dissipation and more consistent damping. They are the go-to for most daily-driven trucks that also see moderate off-road use.
For more demanding applications, reservoir shocks and coilovers represent the next tier. Reservoir shocks add an external canister that increases oil and nitrogen capacity, providing even better cooling and resistance to fade during long, high-speed desert runs or intense rock crawling. Coilovers combine the shock and spring into a single, adjustable unit, allowing for fine-tuning of both ride height and damping characteristics. They offer the ultimate in all-around performance but come at a higher cost and require more expertise to set up correctly.
| Shock Type | Best Use Case | Adjustability | Service Life |
|---|---|---|---|
| Monotube | Daily driving, moderate off-road | Limited | 50,000 miles |
| Twin-Tube | Budget builds, street use | None | 30,000 miles |
| Reservoir Shocks | Heavy off-road, racing | Compression & rebound | Rebuildable |
| Coilovers | All-around performance | Height & damping | Rebuildable |
Planning Maintenance for Modified Components
A suspension lift is not an “install-and-forget” modification. By altering angles and increasing stress, you are fundamentally changing the vehicle’s maintenance requirements. Committing to a lift is committing to a more rigorous inspection and service schedule. Neglecting this “reliability budget” is a surefire way to experience premature component failure, often far from home.
The most critical maintenance event occurs immediately after installation. As the new components settle, bolts can loosen. A thorough re-torqueing of every suspension fastener after the first 500 miles is not a suggestion; it is a mandatory safety procedure. This is also the time to inspect for any signs of rubbing from the larger tires, check shock seals for leaks, and ensure all bushings are seated correctly. This initial inspection sets the stage for the vehicle’s long-term health.
Long-term, the maintenance schedule must be accelerated. Components like ball joints, tie rod ends, and wheel bearings will wear faster due to the increased leverage from larger, heavier tires and wheels. Regular inspections of these parts for any signs of play or wear are essential. For high-performance, rebuildable shocks (like reservoir or coilover models), adhering to the manufacturer’s service interval is crucial for maintaining performance. Indeed, many suspension experts recommend a full service annually, or even more frequently, for vehicles subjected to aggressive off-road driving conditions.
This post-installation checklist is your first line of defense against long-term issues.
500-Mile Post-Installation Inspection Checklist
- Re-torque all suspension bolts to manufacturer specifications while vehicle is loaded
- Check for any signs of component interference or rubbing
- Inspect shock seals for leaks or weeping
- Verify alignment settings haven’t shifted
- Check all bushings for proper seating and early wear signs
Preventing Frame Damage
While component wear is a concern, the most catastrophic potential failure from an improper lift is damage to the vehicle’s frame. The frame is the backbone of your truck, and any compromise to its integrity can render the vehicle unsafe and effectively worthless. Poorly designed lift kits can create “stress risers”—points where forces are concentrated on weak areas of the frame not designed to handle them.
Quality suspension systems are engineered to distribute these forces correctly. They often include frame reinforcement brackets that bolt or are welded on to strengthen critical areas, such as the mounting points for control arms or track bars. Another key element is proper bump stop placement. Bump stops are designed to limit upward suspension travel, preventing the shock from bottoming out and, more importantly, stopping the axle from impacting the frame with destructive force. A cheap lift kit that fails to extend the bump stops correctly is an open invitation to a bent frame.
It’s also crucial to understand that increasing suspension travel and leverage has consequences. As noted by one suspension engineering team, “Oversized tires and wheel spacers increase stress on axles, knuckles, and the frame itself, leading to premature failure.” This is especially true for payload and towing capacities. A long-travel suspension system designed for high-speed desert performance will almost certainly have a lower payload rating than the stock setup. Overloading a vehicle with a modified suspension is a primary cause of stress-related frame cracks.
Case Study: Stress Riser Prevention in Lifted Trucks
An engineering analysis of frame failures in lifted trucks revealed that lift kits using poorly designed drop brackets were concentrating suspension forces on thin, unreinforced sections of the frame, leading to cracks over time. In contrast, premium kits that included 1/4-inch steel frame reinforcement brackets and correctly extended bump stops showed no signs of frame stress. The study also found that trucks with long-travel systems used for heavy hauling experienced a significant increase in frame flex, confirming that payload capacity must be de-rated to prevent long-term damage.
The Mistake of Neglecting Worn Components
There is a dangerous temptation to use a new lift kit as a “fix” for existing suspension problems. Many owners think that installing new shocks and springs will cure the clunks, sloppy steering, or wandering feel of their aging truck. This is a critical error. Installing a high-performance suspension system onto a foundation of worn-out ball joints, bushings, and tie rod ends is like building a house on sand. Not only will it fail to solve the original problems, but it will accelerate the failure of both the new and old components.
The increased forces and leverage from a lift kit and larger tires will exploit any weakness in the existing system. A ball joint with minor play under stock conditions can fail completely within a few thousand miles when subjected to the stress of a 35-inch tire. Worn control arm bushings will deflect even more, making it impossible to maintain proper alignment and causing erratic handling. You are not just wasting the money spent on the lift; you are creating a vehicle that is unpredictable and unsafe.
Before ordering any lift components, a thorough baseline inspection of the entire front and rear suspension and steering system is mandatory. Every wear item must be checked and replaced if it is not in perfect condition. This pre-modification audit ensures your investment is built on a solid, reliable foundation, allowing the new components to perform as designed. Starting with a healthy stock system is the most cost-effective way to achieve a successful and durable modification.
Your 5-Point Pre-Modification Suspension Audit
- Baseline Documentation: Take detailed photos and notes of the current ride height, and document any existing noises, vibrations, or handling quirks.
- Wear Component Check: With the wheels off the ground, use a pry bar to check for any play in ball joints, control arm bushings, and tie rod ends. Inspect all boots for rips.
- Fluid & Leak Inspection: Check shocks for any signs of oil weeping or leaks. Inspect the power steering box and lines for wetness that could indicate a slow leak.
- Frame Integrity Check: Using a bright light, carefully inspect the frame around all suspension mounting points for signs of stress cracks or severe rust.
- Performance Baseline: On a safe, empty road, note the vehicle’s body roll during turns and its stability during a firm (but safe) braking maneuver. This provides a “before” feel to compare against later.
Key Takeaways
- Suspension geometry is not optional; correcting caster, camber, and toe after a lift is essential for safety and handling.
- On-road ride quality is dictated by matching spring rates and shock valving to your vehicle’s total weight, not lift height.
- A suspension lift is a commitment to a more frequent and thorough maintenance schedule for all related wear components.
Finding Legal and Safe Trails for 4×4 Use
Once you’ve correctly engineered and installed your suspension system, the final step is to use it as intended. However, a lifted truck brings a new set of responsibilities and considerations, both on and off the road. Legality is a primary concern. Most states and jurisdictions have strict laws regarding maximum bumper heights, fender coverage, and lighting. A 6-inch lift and 40-inch tires might look impressive, but it could also attract hefty fines and failed inspections if it violates local regulations.
Safety and preparedness also evolve. The factory-supplied jack is now likely useless. Safe recovery requires new equipment, such as a hi-lift jack, and an understanding of how the new suspension height affects winch angles and recovery point stress. Your build must be matched to the trail’s difficulty. Using a vehicle built for moderate overlanding on an extreme rock-crawling trail is a recipe for damage and a dangerous recovery situation.
The key is realistic “use-case alignment.” Don’t build a competition-level rock buggy if you primarily drive on fire roads and camp with your family. As one case study of Jeep owners revealed, those who installed moderate 2-4 inch lifts for the types of trails they actually frequented reported much higher overall satisfaction than owners with extreme 6+ inch lifts who rarely ventured off-road. The most successful modification is one that is honestly and accurately aligned with its intended purpose, ensuring maximum enjoyment, safety, and reliability.
Case Study: Vehicle-Trail Matching Success Story
A group of Jeep Wrangler JL owners found that matching their suspension modifications to their intended trail use dramatically improved both safety and enjoyment. Owners who installed 2-4 inch lifts with quality shocks for moderate overlanding trails reported better overall satisfaction and fewer mechanical issues than those who installed extreme 6+ inch long-arm kits but used their vehicles primarily on mild trails and public roads. This demonstrated the vital importance of realistic modification planning over simply chasing maximum lift height.
By shifting your perspective from buying a product to engineering a system, you transform the outcome. The goal is no longer just to fit bigger tires, but to create a more capable, more reliable, and ultimately more enjoyable vehicle that is perfectly tailored to your real-world needs. This thoughtful approach is the true path to a successful suspension modification.
Frequently Asked Questions About Lifted Truck Suspensions
How do bumper height laws affect lifted vehicles on public roads?
Most states regulate bumper heights, typically limiting lifts to 3-6 inches. Exceeding these limits can result in fines and failed inspections. It is crucial to check your local vehicle codes before deciding on a lift height.
What recovery gear changes are needed after lifting?
Stock jacks become useless with lifts over 3 inches. You’ll need a hi-lift jack and know how to use it safely. You may also need extended recovery points and need to be mindful of adjusted winch angles for safe recovery operations.
How do I match my suspension build to specific trail types?
It depends on the primary use. Rock crawling requires maximum articulation and low-speed control, often favoring long-arm kits and coilovers. Overlanding needs a balance of on-road comfort for long distances and moderate off-road capability, making a 2-3 inch lift with quality monotube or reservoir shocks a popular choice.