
In summary:
- The highway shoulder is a statistically proven danger zone; your first priority is to make your vehicle hyper-visible.
- Follow a “Stay or Go” decision framework: exit the vehicle only if it is clearly unsafe or you can reach a protected area.
- When calling for help, use a clear protocol (like the 5-W’s) to provide precise information to responders.
- Prepare for specific scenarios like extreme cold or towing, as they add layers of complexity to a breakdown.
It’s a scenario every driver, especially a parent, dreads: the sudden sputtering of the engine, the loss of power on a busy highway, and the unnerving feeling of being a sitting duck as traffic rushes past. The conventional advice often feels too simple: “pull over,” “turn on your hazard lights,” and “wait for help.” While these steps are a start, they barely scratch the surface of what it takes to navigate a high-stakes roadside emergency safely. This generic advice fails to account for the dynamic, unpredictable nature of the highway environment.
The truth is, surviving a breakdown isn’t about following a static checklist. It’s about understanding the hierarchy of risks and making informed decisions in real-time. What if the real key to safety isn’t just waiting passively, but actively managing your visibility, communication, and position relative to the flow of traffic? This guide moves beyond the platitudes to provide a clear, instructional framework for risk assessment. We will dissect the dangers, outline a hierarchy of actions, and equip you with the knowledge to turn panic into a plan.
This article will walk you through a structured approach to roadside emergencies. We will start by understanding the real dangers of the highway shoulder, then move to a clear action plan covering visibility, communication, and the critical decision of whether to stay in or exit your vehicle. Finally, we’ll cover specific, challenging scenarios to ensure you are prepared for anything.
Contents: A Guide to Managing Roadside Emergencies
Understanding the danger of the emergency shoulder
The first step in managing a roadside emergency is to fundamentally respect the danger of your location. The “emergency shoulder” is not a safe zone; it is a high-risk buffer zone where tragic accidents are shockingly common. Distracted, drowsy, or impaired drivers frequently drift onto the shoulder. In fact, statistics from New York accident data show that more than 1,500 people get injured or killed annually on the shoulder of the road in the U.S. This danger is compounded by a dangerous psychological phenomenon.
Experts refer to this as the “moth effect,” a cognitive bias where drivers are subconsciously drawn toward lights or objects that catch their attention. As the Maryland Department of Transportation’s Highway Safety Office explains:
The ‘moth effect’ describes how drivers often drift toward lights or objects that attract their attention – even if those lights or objects are located on a vehicle off the roadway, parked on the shoulder.
– Zero Deaths Maryland, Maryland Department of Transportation Highway Safety Office
This means your own hazard lights, intended to warn others, can inadvertently attract a distracted driver. The risk is not theoretical. According to the Insurance Institute for Highway Safety, more than 14,000 people a year are injured in crashes involving a stopped or disabled vehicle. Beyond direct strikes, the shoulder itself can be hazardous, with soft ground, hidden debris, or an uneven slope that can make your vehicle unstable. Understanding this inherent risk is the foundation for all subsequent safety decisions.
The visibility error
Given the dangers of the “moth effect” and distracted driving, simply turning on your hazard lights is a passive and insufficient action. This is the great visibility error: assuming that being minimally visible is enough. In a high-speed environment, your goal must be hyper-visibility. You need to create a visual footprint that is impossible for an approaching driver to ignore or misinterpret. This involves a clear hierarchy of tools and actions.

As the image above illustrates, visibility is most compromised at dusk and dawn, or in adverse weather like fog and rain. It is precisely in these low-light conditions that a multi-layered approach to visibility is critical. Your strategy should move from the vehicle outward, creating concentric circles of warning. The most effective approach includes:
- Immediate Action: Turn on your hazard lights the moment you realize you have a problem. This is your baseline signal.
- Signaling Intent: Pop the hood. This is a universal sign of mechanical trouble that distinguishes you from a car simply pulled over.
- Creating Distance: Place reflective triangles on the road. The standard is about 45 meters (150 feet) behind your vehicle, but on a high-speed highway, extend this to 100-150 meters (300-500 feet). This gives approaching drivers far more time to react.
- Active Illumination: Deploy LED road flares. Unlike passive reflectors, these battery-powered flares emit a bright, flashing light that is significantly more effective in rain, fog, and snow. They are the top tier of visibility tools.
Finally, if you must exit the vehicle, wearing a reflective vest is non-negotiable. It transforms you from a dark shape into a bright, human silhouette, dramatically increasing your personal safety.
Optimizing the call for help
Once you have maximized your visibility and assessed your immediate safety, the next step is to initiate a call for help. However, in a state of stress, it’s easy to provide incomplete or confusing information. Optimizing your call means treating it like a protocol, not a panicked conversation. The goal is to give dispatchers and responders the exact information they need to find you quickly and understand the situation before they even arrive. Adopting the 5-W’s protocol can bring order to the chaos.
Before you even dial, take a deep breath and gather the key facts. Use your GPS app to get your precise coordinates or look for the nearest mile marker or exit number. When you connect with a 911 operator or roadside assistance dispatcher, clearly state the following:
- Who you are: “My name is [Your Name], and I have passengers in the car, including children.” Mentioning vulnerable passengers immediately elevates the priority of the call.
- What happened: “I’ve had a mechanical failure; the engine died,” or “I’ve been in a single-vehicle accident.” Differentiating between a breakdown and a crash is crucial.
- Where you are: Provide your exact location. “I am on I-95 North, at mile marker 123.5,” or “I am on the shoulder of Route 50 West, just before the Main Street exit.”
- What surrounds you: Describe the scene. “I am on the right shoulder, next to a wooded area,” or “I am on a narrow bridge with no shoulder.” This helps responders anticipate the scene’s dangers.
- What you need: Be specific. “I need a tow truck for a front-wheel-drive SUV,” or “I need police and medical assistance.”
Remember that responders are putting themselves at risk to help you. Adhering to “Move Over” laws by slowing down and changing lanes for emergency vehicles is a vital part of roadside safety culture. A clear, calm, and concise call for help is the best way to ensure they can do their job safely and get you out of danger efficiently.
Comparing assistance services
The moment you’re stranded on the roadside is the worst possible time to start researching who to call for help. The decision of which assistance service to use should be made long before you ever need it. The options vary widely in cost, coverage, and limitations, and the best choice depends entirely on your driving habits, vehicle age, and budget. Having a plan in place removes one major stressor from an already overwhelming situation.
The most common providers fall into several categories, each with distinct pros and cons. Understanding this landscape allows you to make a proactive choice, as this roadside assistance comparison from AAA shows.
| Provider Type | Towing Distance | Annual Cost | Key Limitations | Best For |
|---|---|---|---|---|
| AAA Classic | 5 miles | $64.99 | 4 service calls/year | Frequent travelers |
| AAA Plus | 100 miles | $100+ | Coverage in any vehicle | Long-distance drivers |
| OEM (Manufacturer) | To nearest dealer | Free with warranty | Limited to warranty period, specific vehicle only | New car owners |
| Credit Card (Visa) | Varies | $79.95 per use | Pay per incident | Occasional emergencies |
| Insurance Add-on | Varies | $20-25/year | May count as claim | Budget-conscious |
| App-based (HONK) | As requested | Pay per use | Real-time tracking | Tech-savvy users |
When choosing, consider the hidden details. For instance, an insurance add-on is inexpensive, but using it may be recorded as a claim and could potentially impact your future premiums. Manufacturer (OEM) coverage is excellent for new cars but often restricts towing to the nearest authorized dealer, which may not be your preferred mechanic. Pay-per-use services offered by credit cards or apps like HONK are great for people who rarely drive, but costs can quickly add up if you face multiple incidents. A dedicated membership like AAA offers peace of mind with a fixed annual cost and defined benefits, making it a strong choice for families and long-distance commuters.
Planning the vehicle exit
This is the most critical decision you will make during a roadside emergency: do you stay in the car or do you get out? There is no single correct answer; it is a dynamic risk assessment based on your specific situation. The common advice to “always stay in your vehicle” is a dangerous oversimplification. Staying inside a burning car is a fatal mistake, just as exiting into fast-moving traffic is. You must weigh the risk of being struck by another vehicle against the immediate risk posed by your car’s condition and location.
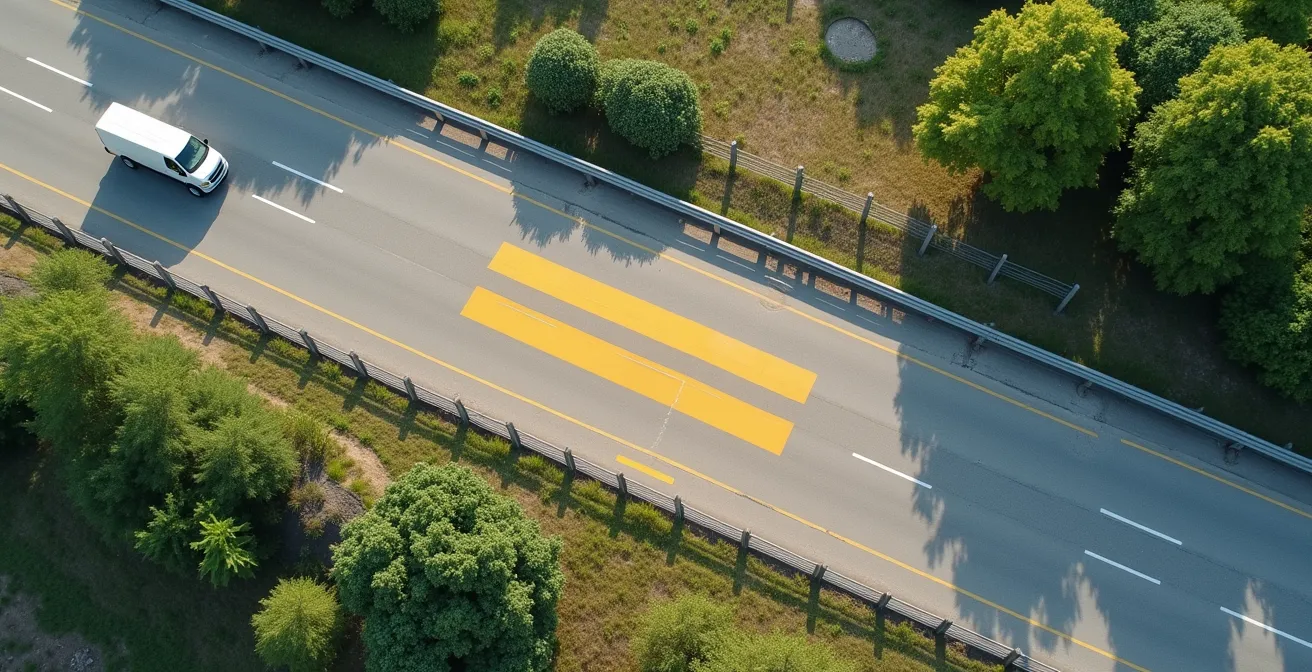
The key is to identify your “Safe Muster Point.” As the aerial view above demonstrates, this is a location well away from traffic, ideally protected by a physical barrier. You must decide if you can safely reach such a point. Never stand behind or beside your vehicle, as this is the primary impact zone. If you exit, your goal is to get behind a guardrail, up an embankment, or at least 20 feet away from the roadway, facing oncoming traffic so you can see what’s coming.
Your Action Plan: The Stay or Go Decision Framework
- Assess the Situation: Quickly evaluate your location and vehicle. Is traffic heavy? Is it daylight? Do you smell smoke? Are you on a bridge or overpass with no escape route?
- Identify Your Safe Zone: Look for a guardrail, a ditch, or an embankment. Is there a clear and safe path to get there, away from traffic?
- Make the “Stay” Decision: STAY IN YOUR VEHICLE with your seatbelt on if you are on a bridge, traffic is extremely heavy and fast, weather is severe, or you cannot see a safe place to go. The car’s structure is your best protection from a direct hit.
- Make the “Go” Decision: EXIT YOUR VEHICLE if you see or smell fire/smoke, if the car is in a dangerously unstable position (e.g., tilting), or if you can confidently reach a safe muster point far from traffic.
- Execute the Exit Protocol: Have a plan. Everyone exits through the doors on the passenger side, away from traffic. Keep passengers, especially children, together. Move quickly and deliberately to your pre-identified safe muster point and stay there.
Understanding Gross Combined Weight Rating (GCWR)
While the principles of roadside safety apply to all vehicles, the situation becomes exponentially more dangerous when towing a trailer. A breakdown involving a tow vehicle and trailer not only creates a much larger physical obstruction on the road but is often caused by an entirely preventable issue: exceeding the vehicle’s Gross Combined Weight Rating (GCWR). The GCWR is the maximum allowable weight of your loaded vehicle and your loaded trailer combined, as determined by the manufacturer. Overloading is a primary cause of transmission failure, brake overheating, and tire blowouts—all of which can lead to a sudden and catastrophic roadside emergency.
Calculating your total weight is not guesswork; it’s a critical safety measure. Before any trip involving a trailer, you must ensure your total weight is safely below the GCWR listed on your vehicle’s doorjamb sticker or in the owner’s manual. A 10% safety margin is highly recommended to account for any miscalculations or added cargo.
- Find your vehicle’s GCWR: Locate this crucial number in your owner’s manual or on the driver-side door jamb sticker.
- Weigh your tow vehicle: Get an accurate weight at a certified scale, often available at truck stops or landscaping supply yards.
- Add passenger weight: Include the weight of all passengers and pets.
- Add cargo weight: Account for all luggage, tools, coolers, and equipment inside the vehicle.
- Add total trailer weight: This must include the weight of the trailer itself plus everything loaded onto it (e.g., a boat, ATVs, camping gear).
- Check against GCWR: Sum up all these weights. If the total approaches or exceeds your vehicle’s GCWR, you are operating in a danger zone and must reduce weight before driving.
A breakdown with an overloaded trailer on a high-speed shoulder is a worst-case scenario. The added length makes you a larger target, and the weight can make the vehicle unstable. Prevention through proper weight management is the most powerful safety tool you have.
Comparing passive and active systems
Modern vehicles are equipped with a sophisticated array of safety systems designed to prevent accidents. However, during a roadside emergency, these same systems can behave in unexpected ways or provide a false sense of security. It’s crucial to understand the difference between passive safety systems (like airbags and crumple zones, which protect you during a crash) and active safety systems (like ABS and lane-keeping assist, which try to prevent a crash). In a breakdown scenario, you cannot blindly rely on active systems to manage the situation for you.
For example, during a sudden tire blowout, your Anti-lock Braking System (ABS) will work to prevent the wheels from locking up, but it cannot counteract the violent pull of the vehicle to one side. Your primary input—gripping the wheel firmly and gently easing off the accelerator—is what will maintain control. Similarly, Lane-Keeping Assist is designed for normal driving conditions and may react erratically if you are trying to maneuver a disabled vehicle onto an uneven or poorly marked shoulder. Over-reliance can delay your own critical reaction time.
In some rare and specific emergency situations, an active system may even need to be manually overridden. For instance, Traction Control, which prevents wheel spin, can work against you if you are trying to “rock” a vehicle out of snow or mud on the shoulder. Disabling it requires a deliberate, expert-level decision, and it must be re-enabled immediately after the vehicle is free. The key takeaway is that technology is an aid, not a replacement for an alert and knowledgeable driver. You are the ultimate decision-maker in an emergency.
Key Takeaways
- Your number one priority in a breakdown is to become hyper-visible using a hierarchy of tools: hazard lights, reflective triangles, and LED flares.
- The decision to stay in your vehicle or evacuate is a dynamic risk assessment. Only exit if you can reach a designated safe zone away from traffic.
- Prepare in advance by choosing a roadside assistance service that fits your needs and having a clear communication plan for calling for help.
Ensuring start-up in extreme Midwest cold
All roadside emergencies are stressful, but having a breakdown in extreme cold, particularly in regions like the Midwest, elevates the situation from an inconvenience to a life-threatening event. At sub-zero temperatures, your vehicle’s systems are pushed to their absolute limits. Engine oil thickens to the consistency of honey, batteries can lose over half their cranking power, and even transmission fluid can become too viscous to lubricate parts properly. This is the ultimate test of both your vehicle’s condition and your emergency preparedness.
A famous case study illustrates this perfectly. As noted in a technical report from AMSOIL regarding a cold-weather failure in the 1991 Corvette ZR-1:
Eight engines had seized at the Bowling Green assembly plant in Kentucky. The temperature had only dipped to slightly below freezing and at startup the hard-to-pump motor oil did not reach the front camshaft bearings.
– AMSOIL Technical Report, 1991 General Motors Corvette ZR-1 Cold Weather Failure Analysis
If this can happen in a factory at just below freezing, imagine the stress on an engine at -20°F. Surviving a breakdown in these conditions requires a specialized emergency kit that goes beyond the basics. Your preparation must account for the cold’s direct assault on mechanical and electrical systems. A dedicated Midwest winter emergency kit should include:
- A lithium-ion jump starter, which performs far better in extreme cold than traditional lead-acid units.
- High-quality thermal emergency blankets, which are superior to standard mylar for retaining body heat.
- Fuel line de-icer and extra windshield washer fluid rated for sub-zero temperatures.
- A bag of cat litter or sand for traction on ice, along with a small shovel.
- For preventative maintenance, using winter-grade synthetic oil (like 5W-30 or 0W-30) and considering a battery blanket or engine block heater for overnight parking are crucial steps.
In extreme cold, the “Stay or Go” decision framework becomes even more critical. Exiting the vehicle into a blizzard can be a fatal choice. Unless the vehicle is on fire, staying inside your sheltered, albeit cold, vehicle is almost always the safest course of action while you wait for help.
Your preparation before a trip is the single most important factor in the outcome of a roadside emergency. Start today by assembling your emergency kit and confirming your roadside assistance plan. This proactive step is the best way to ensure the safety of you and your passengers.
Frequently Asked Questions on Roadside Emergency Safety
What information should I provide when calling 911 for roadside assistance?
Follow the 5-W’s protocol: Who you are (mention vulnerable passengers), What happened (accident vs. mechanical), Where you are (use mile markers or GPS coordinates), What surrounds you (road conditions, landmarks), and What you need (specific type of assistance).
What should I do if I have no cell signal?
Pre-download offline maps before traveling, consider satellite messengers for remote areas, and carefully assess whether leaving the vehicle for help is safer than waiting. Stay with your vehicle if weather conditions are severe.
How can I use my smartphone’s emergency features?
Enable Emergency SOS on your phone, share your live location with trusted contacts via mapping apps, and populate your Medical ID information which first responders can access from your locked screen.
How does ABS react during a tire blowout?
ABS prevents wheel lockup but cannot compensate for the sudden pull to one side. Grip the wheel firmly, ease off the accelerator gradually, and avoid sudden braking to maintain control.
Should I rely on lane-keeping assist during an emergency?
No. Over-reliance on active systems can delay reaction time. These systems may not respond appropriately to emergency maneuvers or shoulder conditions.
When should I manually disable traction control?
Only when ‘rocking’ a vehicle out of snow or mud on the shoulder. This is an expert-level decision with risks – re-enable immediately after freeing the vehicle.